Table of Contents
Adjust Z-offset -Tina2S V10
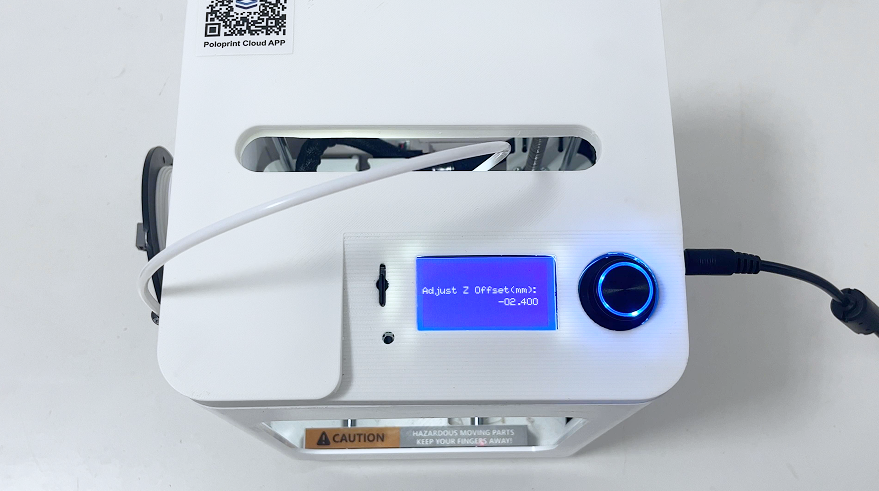
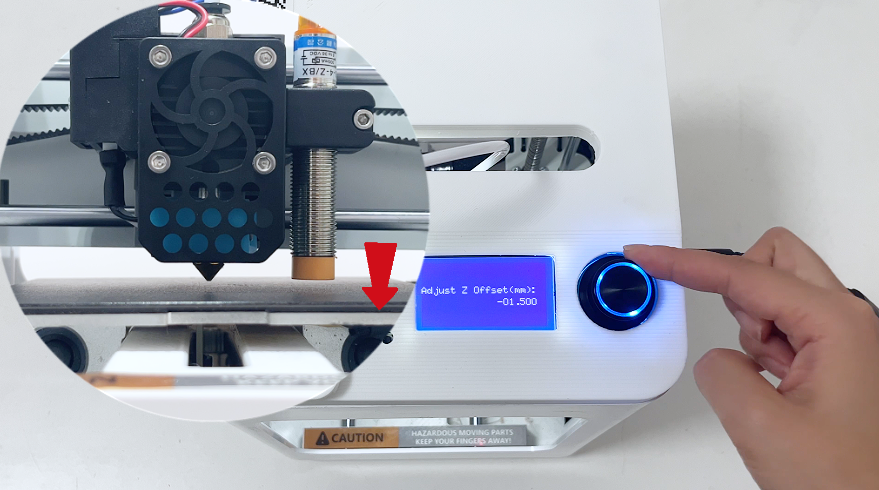
1. Click on "Z-Offset":
Locate the Z-Offset adjustment option in the printer's control panel.
 You can adjust the distance between the nozzle and the platform by increasing or decreasing the Z-Offset. This is usually done in small increments, typically in millimeters.
2. Determine the Adjustment Direction:
Before starting the adjustment, it's important to determine whether to increase or decrease the Z-Offset.
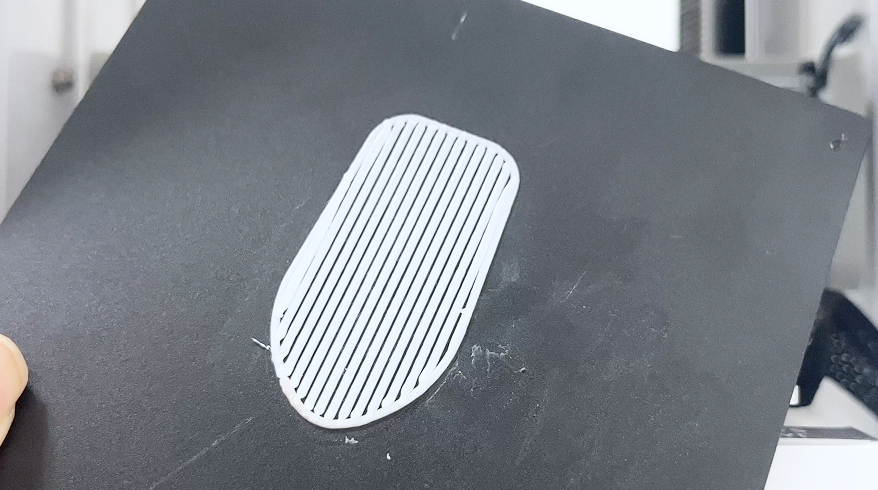
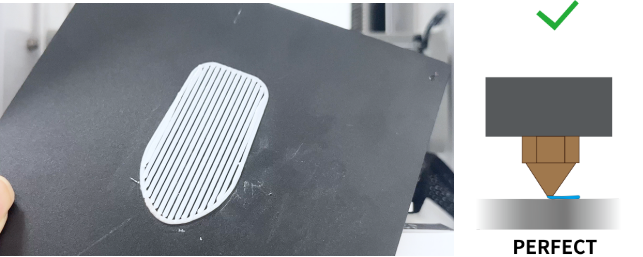
The ideal state is when the first layer lines are flattened, smooth, and adhere well to the platform.
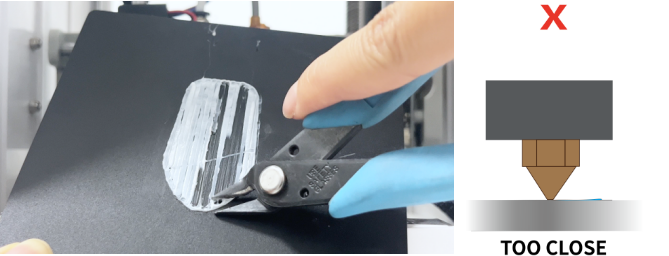
 If the first layer appears loose, with round lines and not tightly adhering to the platform, it indicates that the Z-Offset is too high, and you need to decrease the Z-Offset.
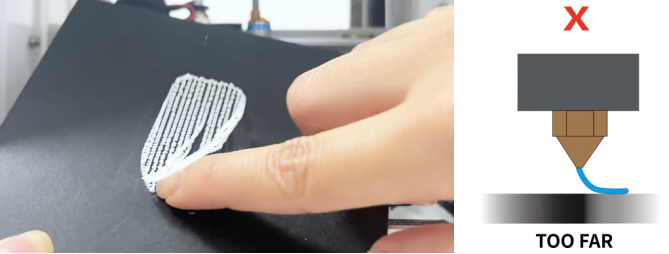
 If the first layer is overly compressed, causing filament to not extrude properly, it indicates that the Z-Offset is too low, and you need to increase the Z-Offset.
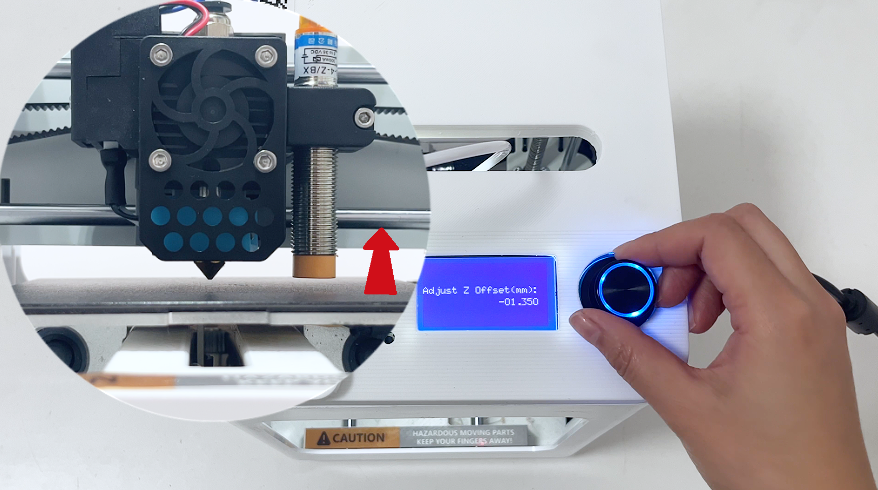
3. Perform Fine-Tuning:
Rotate the knob to adjust the Z-Offset, ensuring that the distance between the nozzle and the platform is 0.1mm. Note: This is not the 0.1mm displayed on the screen but the actual observed distance between the nozzle and the platform.
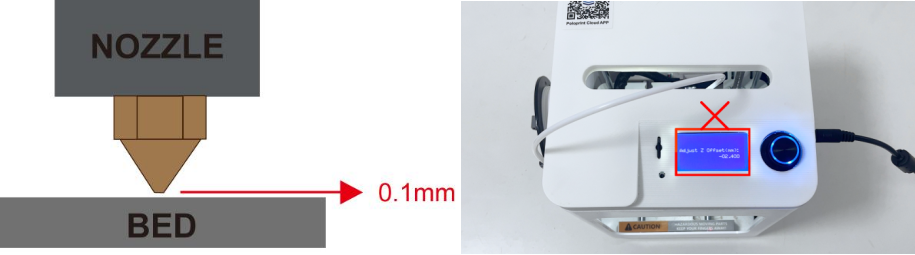 You can also use a regular sheet of paper as an aid. Adjust the offset until the nozzle just lightly touches the paper.
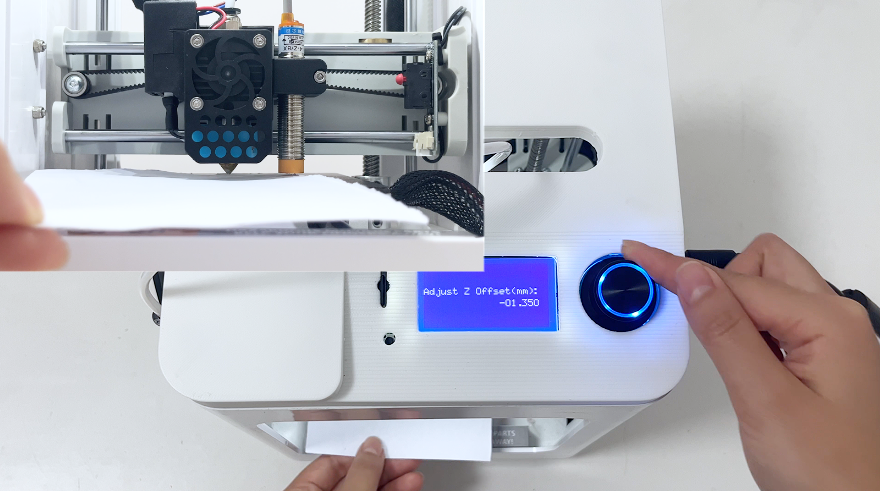
4. Repeat Adjustment:
Based on the results of test printing, if further improvement in print quality is needed, repeat the above steps, fine-tuning the Z-Offset until the desired printing effect is achieved.