PoloPrint Wiki
Docs » starry:cura

How to configure Ultimaker Cura

Add the configuration file of the corresponding model in the official open source version of ultimaker, and then you can select the model to use in the interface.


It should be noted that some functions cannot be used, specifically: the usb connection cannot be used, and the information displayed by clicking the print file is only the layer and high level information.
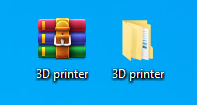
Cura-5.6.0:3d_printer.zip

Windows - configuration method

1.Download the compressed package and unzip it.

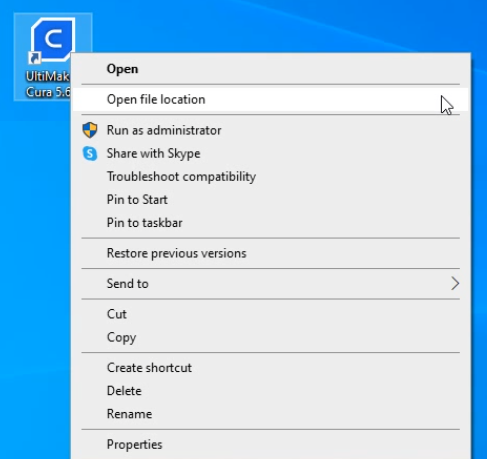
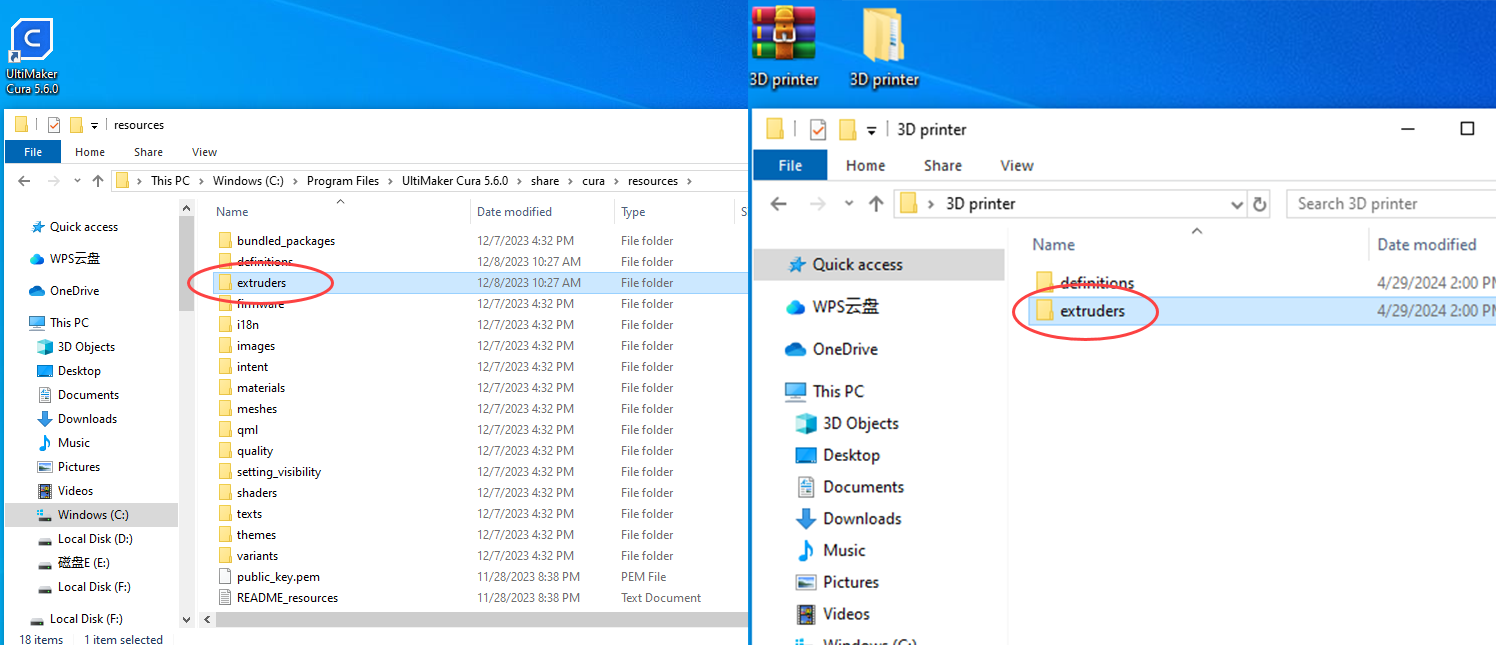
2..Right click the cura icon and select “Open file location”.


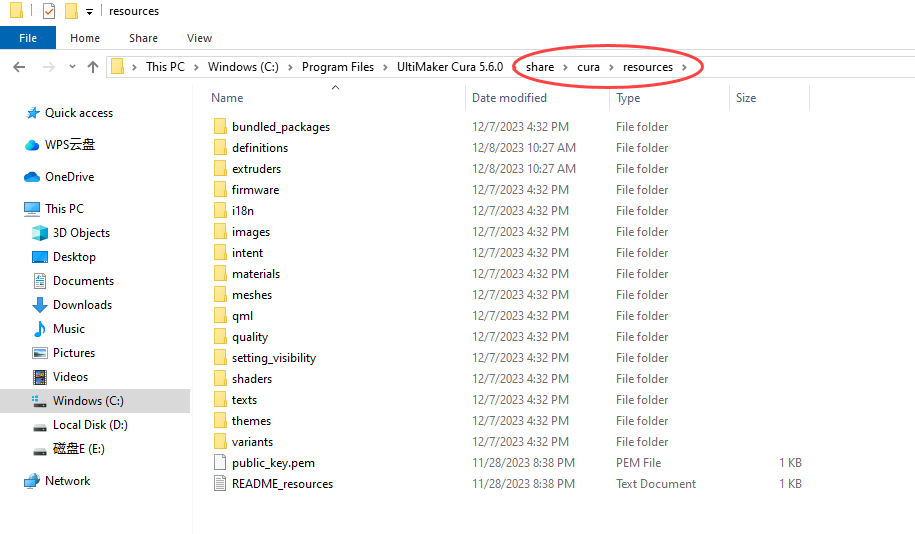
3.open in sequence “share→cura→resources:”


4.Open the “definitions” folder and copy all the files in “definitions” in “tina2-resources” to this folder.


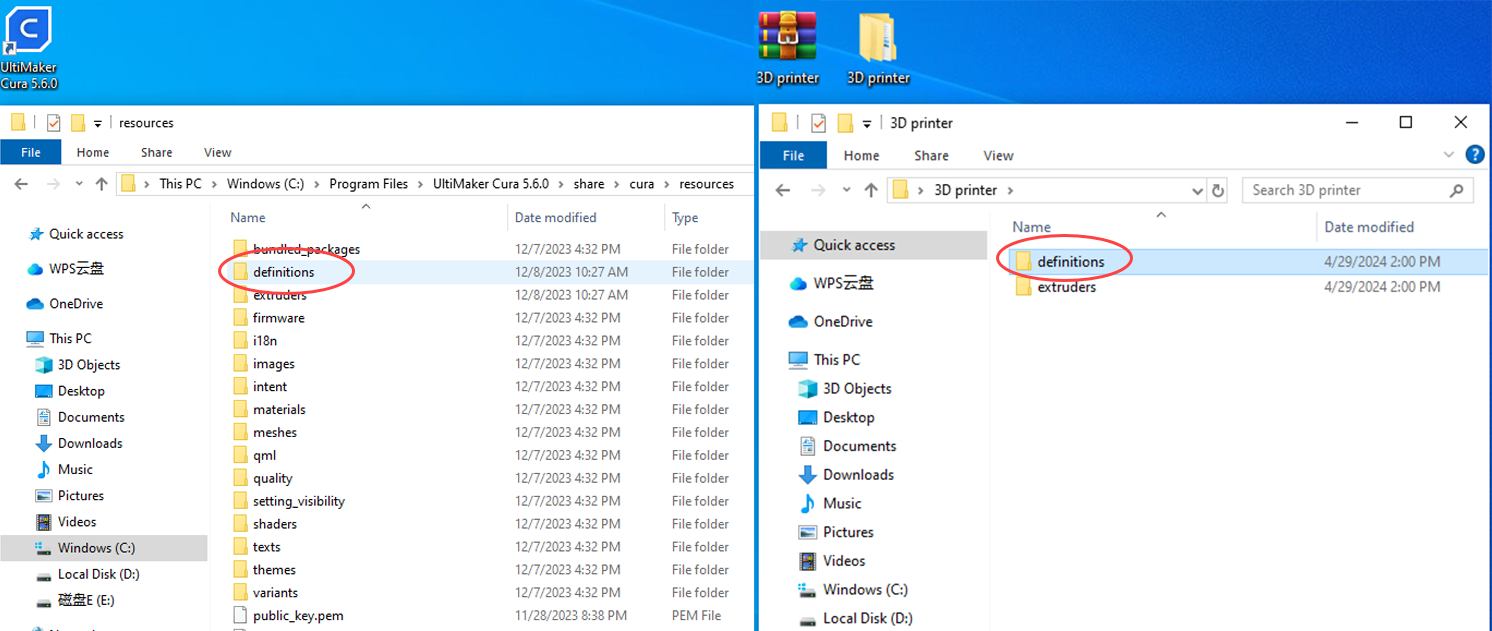
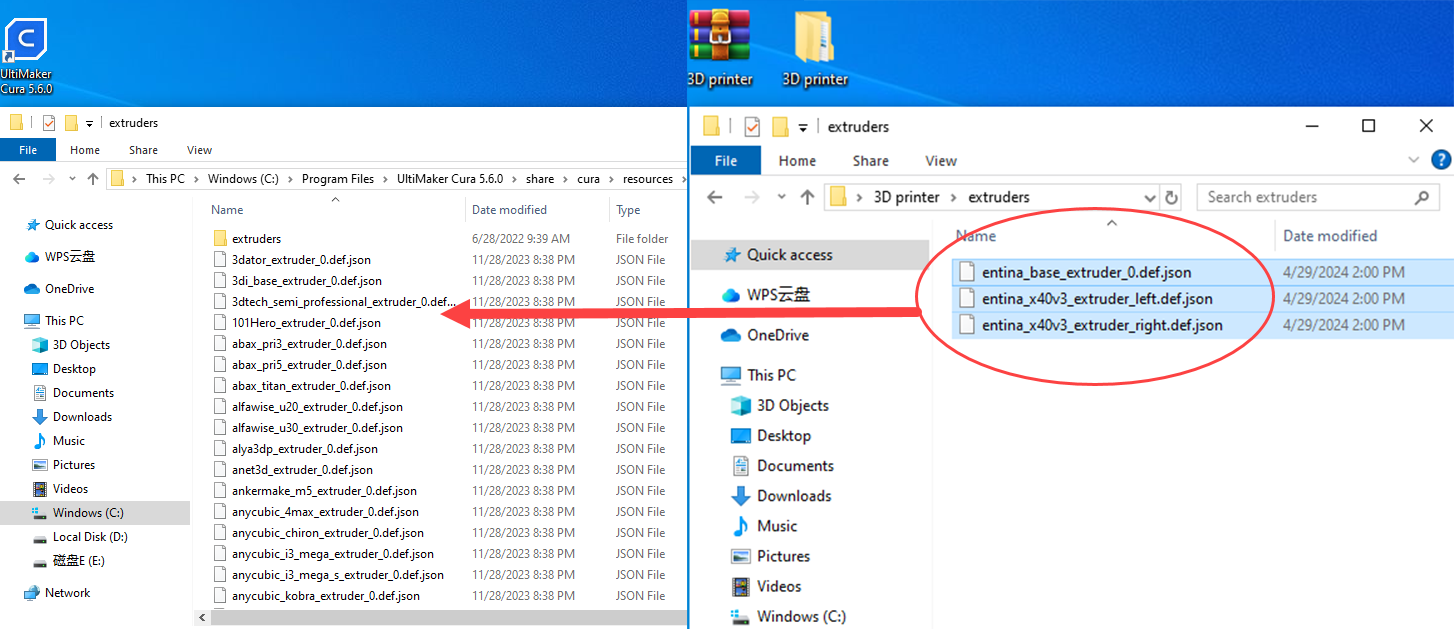
5.Open the “extruders” folder and copy all the files in “extruders” in “tina2-resources” to this folder.


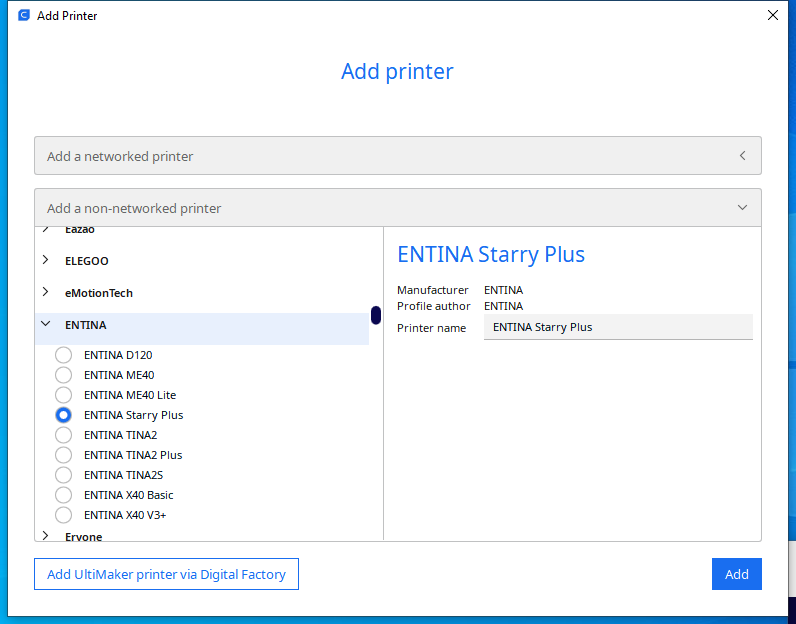
6.Open “Cura”. Select the “ENTINA-Starry Plus”.

Mac Os - configuration method

1.Right-click the cura icon and select “Show Package Contents”, open “Contents” → “Resources” → “share” → “cura” → “resources”:

2.The other steps are the same as Windows, copy “definitions” and “extruders” into a folder with the same name.

Previous Next

PoloPrint Wiki

Table of Contents

Table of Contents

  • How to configure Ultimaker Cura
    • Windows - configuration method
      • Mac Os - configuration method

Home

Starry Serials

  • Introduce
  • Unpacking Guide
  • User Manual
  • Wifi Config
  • Slicing Software
  • Maintenance
    • Clean the nozzle
    • Clean X-axis horizontal bar
    • Clean Z-axis silk rod
    • Clean Spray head fan
    • Clean X leather belt
    • Clean Y leather belt
    • Clean X rubber wheel
    • Clean Y rubber wheel
    • Replace the nozzle
    • Replace the proximity switch
    • Replace the fan
    • Replace the X travel switch
    • Replace the Y travel switch
    • Replace the Z travel switch
    • Replace the extruder assembly
    • Replace X motor
    • Replace Y motor
    • Replace Z motor
    • Replace the broken wire detection module
    • Replace the light strip board
    • Replace X belt
    • Replace Y belt
    • Replace Y rubber wheel
    • Replace X rubber wheel
    • Change the motherboard
    • Replace the chassis fan
    • Replace the power
    • Replace the hot bed
    • Clean Spray head fan
    • Replace the 20P line
    • Firmware upgrade
  • FAQ