PoloPrint Wiki
Docs ยป adjust-the-height-of-the-proximity-sensor

Adjust the proximity sensor position

Your browser does not support the video tag.

1. Use a 2.5mmL wrench to loosen the screw.

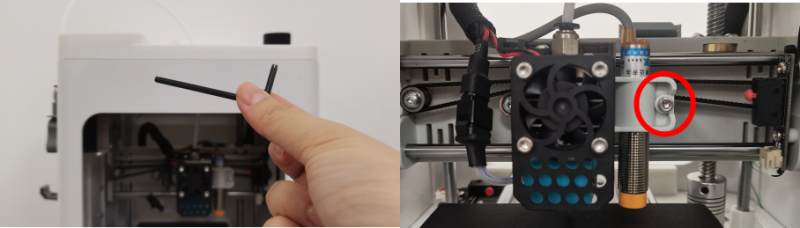
2. Adjust the approach height and tighten the screw.
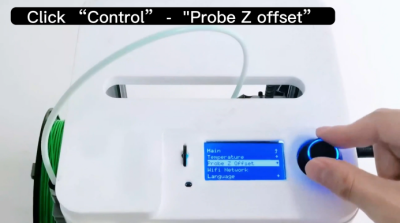
3. Z-offset is required after installation.


Replace the proximity sensor

1. Use a 2.5mmL wrench to loosen the screw.

2. Cut off the ties and untie the black wrapping cloth.

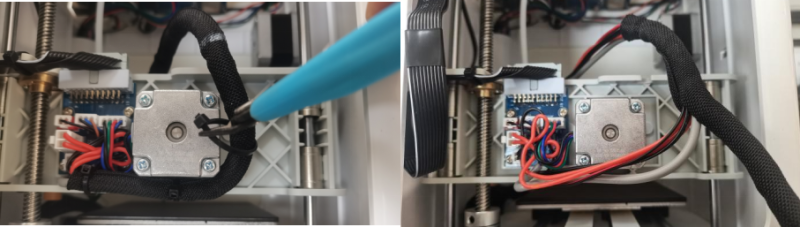
3. Unplug the plug and remove the proximity sensor.

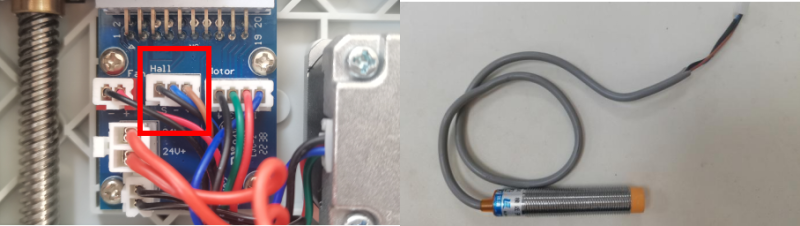
4. Replace and install a new proximity sensor and adjust the Z-offset.

Previous Next

PoloPrint Wiki

Table of Contents

Tina2 Serials

  • Introduce
  • Unpacking Guide
  • User Manual
  • Tina2 Plus
  • Wifi Config
  • Wifi Function
  • Calibration
  • Slicing Software
  • Cura
  • Firmware Update
  • Octoprint
  • Maintenance
  • Filament
  • FAQ

Starry Serials

  • Introduce
  • Unpacking Guide
  • User Manual
  • Wifi Config
  • Slicing Software
  • Maintenance
  • FAQ

D120

  • Introduce
  • Unpacking Guide
  • User Manual
  • Wifi Config
  • Wifi Function
  • Calibration
  • Slicing Software
  • Firmware Update
  • Octoprint
  • FAQ

X40 Serials

  • Introduce
  • Unpacking Guide
  • User Manual
  • Dual Extrusion Printing
  • Calibration
  • Wifi Config
  • Wificam Function
  • Slicing Software
  • Firmware Update
  • Octoprint
  • FAQ

ME40 Serials

  • Introduce
  • Unpacking Guide
  • User Manual
  • Calibration
  • Slicing Software
  • Firmware Update
  • FAQ

Links

  • PoloPrint Community
  • Firmware Source Code
  • Slicer Profiles
  • ENTINA official website
  • WEEDO official website
  • WEEFUN official website