PoloPrint Wiki
Docs » replace_fan_v10

Replace fan - Tina2s V10

Your browser does not support the video tag.


Perform the “Load filament” and wait until the nozzle temperature is higher than 50℃, then check whether the fan is rotating. If it does not rotate, it is a fan failure and needs to be replaced.

Replace fan - Tina2s V10


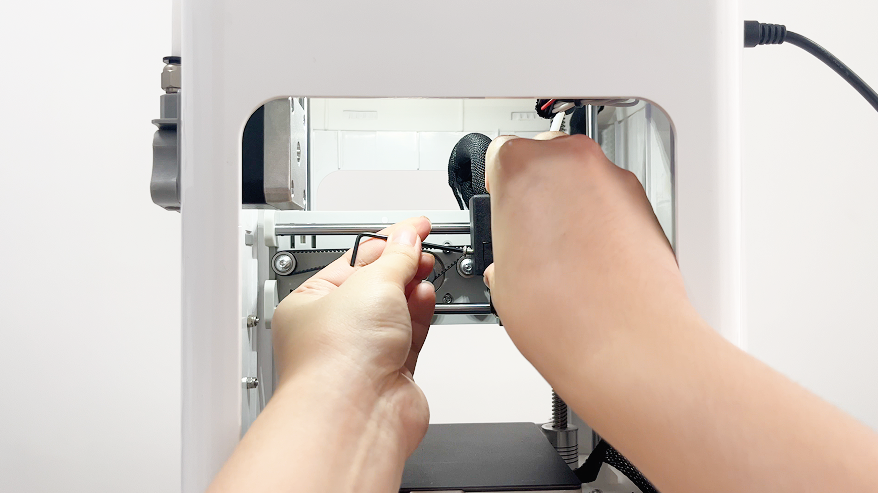
1.Loosen this screw with a 2mm L-wrench and open the cover. 
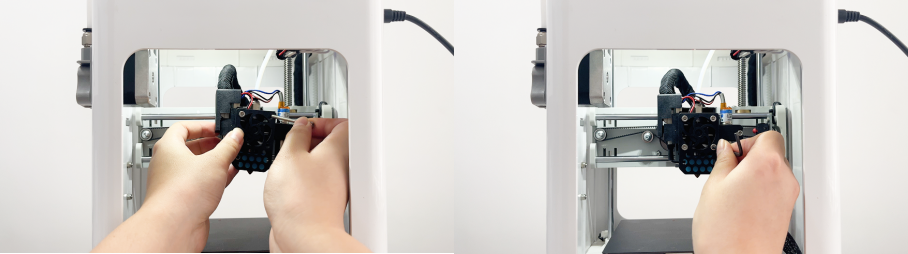
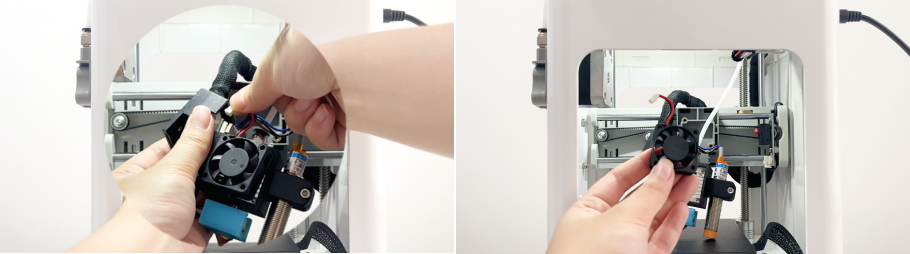
2.Loosen these 4 screws with a 2.5mm L-wrench. 
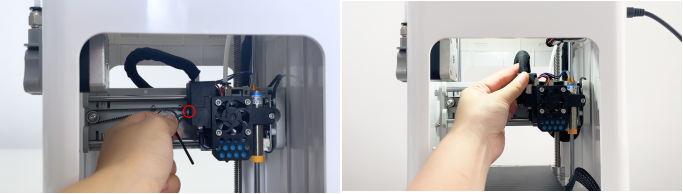
3.unplug this connector, and remove the fan. 4.Install the new fan, ensuring that this label faces inwards. 
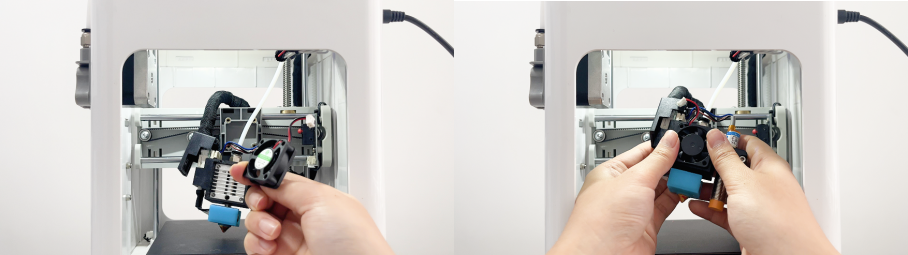
5.Plug in the connector. 
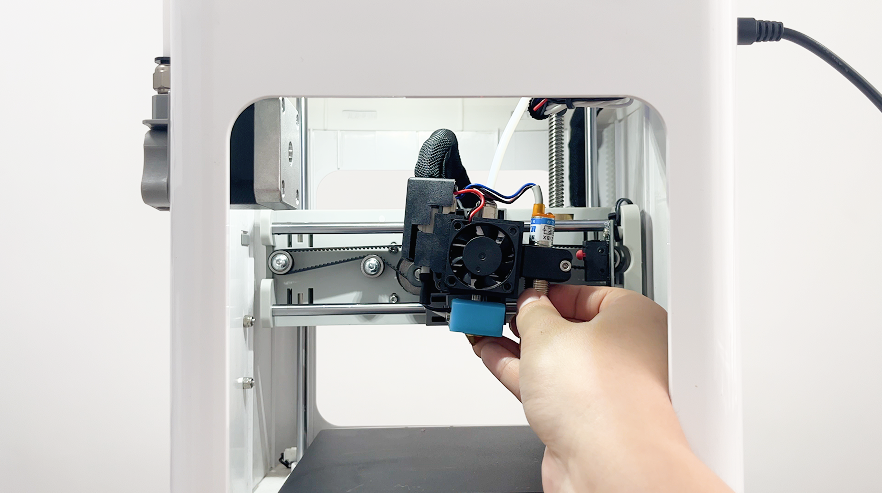
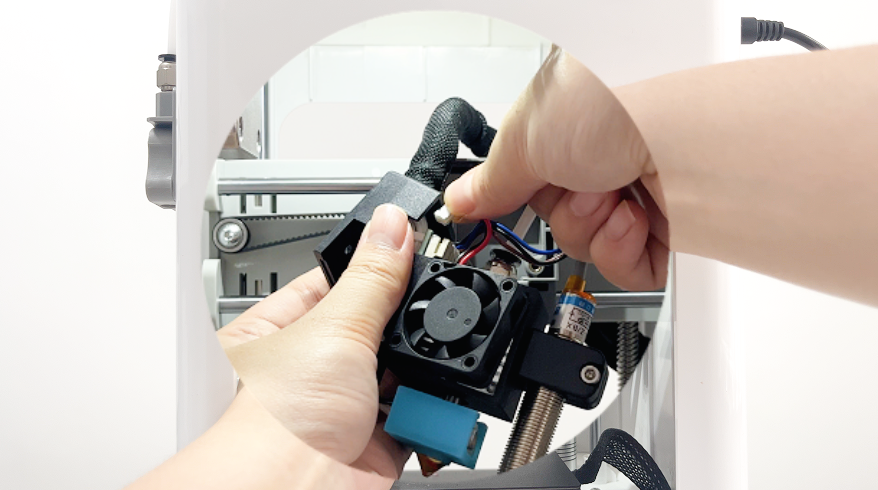
6.Use the 4 screws to reinstall the entire assembly, and tighten the screws.

Previous Next

PoloPrint Wiki

Table of Contents

Tina2 Serials

  • Introduce
  • Unpacking Guide
  • User Manual
  • Tina2 Plus
  • Wifi Config
  • Wifi Function
  • Calibration
  • Slicing Software
  • Cura
  • Firmware Update
  • Octoprint
  • Maintenance
  • Filament
  • FAQ

Starry Serials

  • Introduce
  • Unpacking Guide
  • User Manual
  • Wifi Config
  • Slicing Software
  • Maintenance
  • FAQ

D120

  • Introduce
  • Unpacking Guide
  • User Manual
  • Wifi Config
  • Wifi Function
  • Calibration
  • Slicing Software
  • Firmware Update
  • Octoprint
  • FAQ

X40 Serials

  • Introduce
  • Unpacking Guide
  • User Manual
  • Dual Extrusion Printing
  • Calibration
  • Wifi Config
  • Wificam Function
  • Slicing Software
  • Firmware Update
  • Octoprint
  • FAQ

ME40 Serials

  • Introduce
  • Unpacking Guide
  • User Manual
  • Calibration
  • Slicing Software
  • Firmware Update
  • FAQ

Links

  • PoloPrint Community
  • Firmware Source Code
  • Slicer Profiles
  • ENTINA official website
  • WEEDO official website
  • WEEFUN official website